Disclosure: Some of the links below are affiliate links, meaning, at no additional cost to you, Storehacks may earn a commission if you click a link to an external source.
This Shopify Tutorial for beginners will give you the absolute essentials for getting started. You’ll see everything from signing up to Shopify to launching your Shopify store.
If you don’t know how to create an online store, Shopify is a great place to start. Shopify makes setting up an online store smooth, easy and cost-effective.
In this article, you’ll learn everything you need to know about starting a Shopify store.
You will learn specific things like:
- What is Shopify and how does it work
- How to set up a Shopify store front
- How to launch your Shopify store
This article is basically the ‘Shopify for dummies‘ that you keep at your disposal as your building an online store.
But before we get into the details about how to set up a Shopify store, you need to know that everything you’re about to read comes from experience, research, and years and years of incredible success and soul-crunching failure.
Why I know so much about Shopify.
Over the past 7 years, there have been a couple of companies that have blown me away. Teespring was the first, based on the low barrier to entry and stripping away the “hard work” of the backend. Shopify was the second.
Firstly… I was able to make over $2,500,000 with Teespring and a further $535,294 in 6 Months with Shopify. Never before has it been this easy to set up an online store and go from concept to profit in such a short time. Never before has building an online store been so accessible.
You don’t need to be a Zuckerberg or Bezos to be successful, all you need is the will and motivation to have a better tomorrow.
Now is your time to start selling online, whether it be your own products, POD or Dropshipping.
But how are these new entrepreneurs getting started? Let’s take a look at this Shopify tutorial, building a website from start to finish, and how the next success story can be yours.
Before you get started – Does Shopify include hosting?
Shopify comes fully hosted.
That is, they take care of your domain, servers, security, and having everything backed up. This gives you peace of mind knowing that your store is safe and secure.
But there are better hosting options out there than what Shopify gives you as part of their package.
The biggest consideration when building an online store should be speed and reliability. If you want to make your own online store reliable, fast and trustworthy, an ultra-reliable host can go a long way towards keeping visitors on your site longer.
- Blue host offers hosting as well as domain name registration
- Namecheap is also another good one and we use it to host all our domain names (we have heaps). It’s also great for keeping all your domains in one place in order to track your spend.
Shopify also allows you to use their hosting and offers a domain name registration service, however, I have found the ones above to be cheaper for creating a Shopify store in the long run.

The Ultimate Shopify step-by-step Tutorial

What is Shopify and how does it work?
Before you start learning how to start a Shopify store, it’s important that you know exactly what Shopify is and what it is not.
So, what is Shopify?
Shopify is a platform that allows you to build, grow and scale an online ecommerce business. You will be able to sell anything from Print on Demand Apparel, Dropshipping from AliExpress (or even locally in your country), white labeled or your own products.
There is a reason Shopify is so successful and it is due to the ease of use. They have thought of absolutely everything and take the headache and steep learning curve out of starting an ecommerce store.
What does a Shopify store look like?
Your Shopify store can look any way you’d like it to look.
Here are a few examples of how you can make your Shopify store look:

WWF has used Shopify to create a fun and inviting web store.

Keeper Jewelry has a stunning dark and minimalist vibe.

Sarah & Abraham nail the cute, girly feel.

Laguna Salt Co. has created a rustic yet high-end vibe.

Kith uses Shopify to create a minimalist streetwear feel.
As you can see, Shopify is a very versatile store builder and you have many many design options.
This is what the backend looks like. It’s the area that you, the seller, will interact with the most:

In here is where you control every aspect of your online store from. More on Shopify’s features later!
What is Shopify used for?
Most commonly, Shopify is used to build an online store, as you saw in the examples above.
People come to your online store, they browse your products, add it to their shopping cart, and pay for their purchase.
But Shopify can also be used for different business models:
Drop shipping
Drop shipping is selling a product you don’t actually have. That is, the customer purchases a product from your store and pays for it.
That same order goes to the manufacturer or the warehouse and is then dispatched directly to the customer, without you, the merchant, ever actually holding the product.
Shopify integrates with Oberlo, which is a great 3rd party application for Drop shipping.
Print on Demand (POD)
Print on demand is similar to drop shipping, but in the sense that the product (usually clothing or home decor) isn’t printed until the purchase is made.
Many POD entrepreneurs have used Shopify to create their brands, using print on demand suppliers like TeeSpring.
Warehousing
From time to time, you aren’t the only person selling your product. For example, you may sell your product in your own online store to individual customers, but also sell your product in bulk to small bricks and mortar retailers.
For this situation, Shopify can be used for both a normal storefront, as well as a password-protected back end where your retail customers can buy large volumes of your product for significantly less.
What does Shopify offer?
Shopify offers you a wide range of tools to build an online store and start selling online.
The free Shopify store builder offers:
- a secure shopping cart and checkout facility
- accept multiple types of payment methods
- unlimited products, bandwidth & online storage
- manual order creation
- abandoned cart recovery
- discount codes & coupons
- staff accounts
- comprehensive dashboard
- financial and inventory reporting
- customer support via email, live chat for free (phone support on paid plans)
All these features are included on each Shopify plan, from the free plan to the enterprise plan. More Shopify features become available as you increase your plan, and ultimately, pay more.
Using the Shopify platform, you can create your online store to look as you want it. Shopify provides a wide range of both paid and free themes. More on this later, though.
Now that we’re on the same page and we know what is Shopify and what it can do, let’s take a look at setting up a Shopify store.
How to set up a Shopify store
As you just saw, Shopify is an incredibly powerful and versatile tool for building your online store. This Shopify tutorial will show you how to create a visually stunning online store.
Most users use Shopify to create an online store, so in this Shopify guide, we’ll do just that.
Create your Shopify Account
Click the banner above to take you to the signup page, enter the required details, email address, password & store name.

Shopify store names
Creating a Shopify store name can be tricky. You need to get your Shopify store name right the first time.
Want to know how to change your Shopify store name?
You can’t.
Your Shopify store name should be the name of your brand, something that you’ve decided on earlier.
If you’re not sure of the name of your store or brand name, start your Shopify trial with a secondary, less important email address. Once you’ve decided on your store name, or brand name, start a new trial using your brand name and your primary email address.
Proceed through the questionnaire and enter all the required details. Don’t be scared to select “I’m Just Playing Around” with “$0. I’m Just Getting Started”.
On the next page enter your contact details and continue the Shopify guide by clicking “Enter My Store”.
How to set up your Shopify store for success
Once you’ve entered your store you will land in the Shopify builder, in your Shopify dashboard.
This is the screen you will use the most in your Shopify career.
It is from here that you will start designing the look and feel of your store, launching your Shopify ecommerce store, products, marketing campaigns and handling payments and shipping.
The more information you can fill in from here and get sorted the easier it will be as you start selling online and focusing on other areas of your store that make the money.

Your new ground zero will take you through all the steps you need to do to get selling.
How to pick a Shopify theme
Shopify has an extensive collection of free and paid themes in their dedicated theme store. Take your time to browse and find a theme that suits the style of the product you’ll be selling.
Have a chat to anyone you know currently on the platform or post in one of the hundreds of groups on Facebook for recommendations.
My personal favorite Shopify theme has always been Turbo. It’s costly, but it’s fast, reliable, clean and most importantly converts.

The benefit of buying a prebuilt theme is you don’t need to know how to code.
The premium themes generally come with a few more options. If you get stuck and need extra functionality contact one of the “Shopify Experts” that are available to help with customization.
Here’s how to find the right theme for your store;
1. Check out the Shopify Theme Store
The Shopify theme store showcases hundreds of free and paid themes and will allow you to filter by features, price, popularity/trending, free or paid.

Another place to check out the best Shopify themes is on Themeforest.net. It is one of the most extensive places you will find for themes for WordPress or WooCommerce and Shopify.
On ThemeForest ensure you read as much of the detail as possible to be sure you are getting what you need. I have found creating sites on WordPress to be much more difficult than Shopify.
Premium Themes
Here is a couple of premium themes I keep hearing good things about. The new Sails Theme by DragonDrop seems very promising with its focus on speed and reducing excess app bloat on your store.
It has a lot of apps built in to minimize your overall cost of running a store.
Here are some premium themes I recommend;
2. Read the Reviews and Features
Once you’ve found a theme you like, the next part of the Shopify set up is to explore the theme and to find the features and any other information pertaining to it.
Scroll down further to check out the reviews. If you like what you see, check out the Shopify theme on your store!
3. Preview it, Baby!
Take the Shopify theme for a test drive by clicking View Demo. It is the button to the left-hand side of the image on the slider.
This is the first point in the Shopify setup process where you start to see your work coming to fruition!

If there are different styles available for the theme you will be able to the select to view the various styles.
4. Love it? Get it!
If you found the theme for your store click “Start with this theme” that’s the button directly opposite the “View demo”.
Shopify will ask you to log in to your store again and ask you on the next page if you want to “Add theme”.
Click to Install.
Once it’s installed, the Shopify builder will take you to the Themes screen. From here click “Customize theme” in the green highlighted section.

5. Let’s Get Pretty
Almost every theme you come across gives you a plethora of options to make your store unique.
If you need Shopify theme help or tutorials, they are here and can guide you through the setup and customization process.
Simple changes to your Shopify theme can have dramatic effects from colors, fonts, imagery etc. The vast amount of options available will have your store as unique as if you’d had a web developer build one.
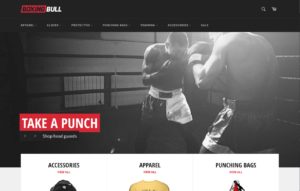
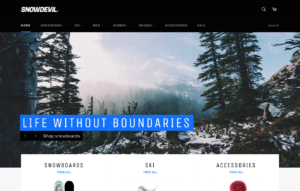
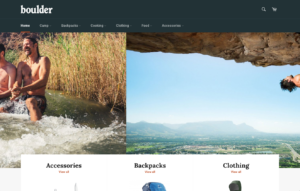
These 3 stores were created using the same theme.
To find the theme you just installed click “Online Store” on the left-hand pane below “Sales Channels”. Take these steps Sales Channels > Online Store > Themes.

Below the published theme (displayed in the big window) will be the one you just installed click “Actions” and Publish. If you’re not ready to publish it just yet you can still customize it.
Before you get started customizing, duplicate the theme so if you mess up you can just revert back to the saved.
Once you’re inside the customize section go through and fill in as much detail as you can. It’ll be here that you upload your logos and imagery.
These are the things you’ll want to complete;
- uploading logos
- uploading slides to the homepage
- adding related item functionality to product pages
- color schemes
- font choices
Each of these points is a separate article in themselves, so this Shopify tutorial can’t go into too much detail about each one, but they’re all pretty self-explanatory.
In here you’ll also need to input all your social addresses.
Want Me to Build Your Shopify Store?
I have just released a Shopify Store Builder service to take the headache out of getting started. Nothing worse than getting caught up wondering what theme, apps or products to sell.
Once the store is created you have the platform to catapult your way to success. I can’t make you successful, but I can give you a platform to begin your own success story with a professional store.
[maxbutton id=”8″]
How to add products to sell to your Shopify store
You’re obviously building a Shopify store to sell products – either physical or digital. Either way, the next step in this Shopify guide is to add them to your store.
If you have your own products then you’ll add products from the Shopify Dash, Products>Add a product

Use the next screen to add as much detail as possible about your products. Ensure you keep SEO in mind with your product name, description & URL.
Make sure you include as much detail as possible about your variants to help your customers check out as fast as possible.
Here in the Shopify website builder, you’ll also upload your product photos. Keep in mind your store branding and keep your main image as consistent as possible.

Product images are the key to good conversions so you will need detailed, high-resolution photos to make the most of the zoom feature.
Keep all images the same dimensions to avoid weird product stacking.
Once you’ve filled in all the details click “Save”.
Create your collections
Collections group common products together for ease of use when customers are visiting your store. Common things people search for when shopping include;
- men’s, women’s or children’s clothing
- clearance or products on sale
- size or colors
- seasonal products like hoodies or tees
- items of a similar type, seats, lights, mats
Items can appear in several different groups. Typically collections are on your homepage and in your menu on your navigation bar.
Doing this makes it as easy as possible for your customers to find what they’re looking for.
Going Auto Is The Only Way – Auto or Manual Collections
When you create collections in your Shopify ecommerce store, you can select how products will be added. There are two options available;
- Automatic – You set up conditions to automatically include certain products into specific collections (recommended).
- Manual – You do it yourself every time you upload a new product
Let’s Get Paid! – Payment Gateways
Gateways allow you to be paid by credit card through your Shopify online store.
This Shopify tutorial can’t tell you what’s exactly best for your business needs. Therefore, you need to do your own research into which payment gateway is the one for your business.
Shopify has their own solution for people in the United States which is powered by Stripe.
I have personally always used Stripe and have found no problems with it (except for expensive chargebacks).
In saying that we have just recently started using Shopify Payments as they now allow for international sellers to charge in USD.
With Shopify Payments (and PayPal) it pays to keep in mind that they can and will take a reserve on your account.
This typically only happens when you are selling products from Aliexpress however still can happen with certain POD Vendors.

There are a few things that you need to keep in mind when choosing your gateway;
a. The Big One – TRANSACTION FEES.
I have no idea (and don’t want to know) the 10’s of 1000’s of $’s I have spent on fees. Sometimes you can’t help but pay them. Most gateways will charge one of two ways and sometimes both. Either a percentage of the sale or flat fee.
Project what your anticipated sales are to work out the fees you’re likely to pay.
b. Card Types
I’ve always believed the more payment options the better when it comes to ecommerce. At the very least you need to have VISA and Mastercard available as payment options.
PayPal is also widely used.
c. Offsite Checkout
Some gateways allow you to process payments outside of the Shopify backend. This method will work for those that stock inventory and want to cut down on fees. Shopify charges transaction fees on top of your Gateway however if you use Shopify Payments you will get a reduced rate.

Shopify Payments Rates as of 25/1/2018
If you live in the USA or UK your store will automatically use Shopify Payments. Setup your account by clicking “Complete Account Setup”
Shopify Tutorial – Policy Pages
Having a clear Refund policy in your online store will help put your customer’s minds at ease.
We also are required to adhere to certain regulations when we are selling online and these pages whilst not unique to your store does help in covering you.
You should keep in mind, however, as they are generic you may need (and should look into it yourself) custom policies made for you by lawyers.
As an alternative to Shopify generated terms and conditions you can check out LegalZoom.
- Settings > Legal
- Generate each of the policies, i.e Terms and Conditions, Privacy Policy, Refund Policy
- Click Pages in the left-hand pane
- Create a page for each of the policies
- Copy and paste policies into place.
- Click Save page and ensure you check them out to make sure they are correct.
Once you have created the policies make sure you add them into your footer. They need to be accessible by your visitors.
How to launch your Shopify store
Hang on now. There’s still a bit more of this Shopify tutorial to get through before you make your Shopify store live.
These details are about your business, your shipping and how you’re paying/collecting tax.
Go to the Settings Page by going to the very bottom of the left-hand panel from your dashboard.
General
Select general and fill out all the business information that is required.

Taxes
Select the appropriate Tax Settings and Rates. If, in this window, there are countries missing be sure to add them via the shipping settings.
This Shopify tutorial can’t give you the tax information you need, so find the tax rates and laws that are relevant for where you’re selling and where you’re based.

Ensure all your products are marked to charge tax via the product screen underpricing.
Shipping
If you need to enter the dimensions of a product to calculate weights fill in those details on the product pages.
Once that’s completed go to the shipping page and add your weight based rates and adjust it to your product specs.
Test Order your Store
We’re getting closer to launching a Shopify store!
Before we do, you need to test to make sure everything is working correctly. To make this easier and not to waste precious cashola on your own business unnecessarily you can use the Bogus Gateway for testing the system.
To use it;
- Admin>Settings>Payments>Payment Settings.
- If there is a gateway enable you’ll need to deactivate it to continue.
- Click Change provider>Third party credit card provider.
- Scroll down the list to other and click “(for testing) Bogus Gateway”
- Click Activate
Go to your storefront and place an order.
Bogus gateway is meant for testing. Shopify will not charge you transaction fees on orders paid.
You can use the following codes in place of the credit card number when checking out:
- 1 – To Simulate an Approved Transaction
- 2 – To Simulate a Declined Transaction
- 3 – To Simulate a Gateway Failure
Any three numbers can be used as the “Card Security Code” and any expiry date in the future will work.
Once you’ve completed the checkout with the Bogus Gateway and everything is awesome it’s time to move on to the main event and test a real live order.
As soon as you’ve placed the order be sure to cancel it unless you want to get a sample (this, of course, won’t be free).
Now it’s time to launch your Shopify store!
Should I buy my Domain through Shopify?
When using Shopify, you get a free domain name, but it does have .myshopify bang in the middle of it. Therefore it’s better to buy your own domain name for your Shopify store.
There are two ways to buy your domain name.
- Through Shopify (incredibly convenient)
- Through a 3rd party provider (if you know how to set up DNS and what not)
Once you have put in your domain name you will need to follow the instructions provided by Shopify. Your 3rd party provider should have documentation on how to connect with Shopify.
The next step is removing any passwords you might have on your account and get set to raise those curtains! It’s time to start selling!
How to cancel Shopify?
Canceling shopify is quite simple but before you do that I would love to encourage you to read how we did $732,701.35USD in 3 weeks with Print on Demand Jewelry or the other inspirational interviews we have on Storehacks.
However, if you must cancel then the steps are quite simple;
1 – From your Shopify Dashboard click “Settings” in the bottom left corner.
2 – Click “Plans & Permissions”
3 – Scroll to the bottom of the page and you will have the choice to “Pause and Build”, “Pause”, or “Sell or Close”.

Before you do hit that cancel button…what made you get started in ecom to begin with? Are you trying to create a side hustle? Wanting to build a business to give yourself a bit of security in an unsecure, tumultuous world?
Ecommerce and it’s scalability continues to blow my mind after being in the industry for over 10 years. I love it, and whilst it was hard in the beginning, the sacrifices you make are absolutely worth it.
If you’re looking for Shopify alternatives then I have an article that can help you out there as well. But just remember, sometimes staying focused is exactly what you need to do.
I have struggled, a lot more than I’d like. I have banged my head against my desk, wanted to throw my computer against the wall and sat in my chair and cried. All I can say… is that in the long run it is worth it. Without it I never would have seen both my children grow from newborn to school age, at home, crawling, toddling, walking and running around my legs.
The struggle is and can be hard, but I have seen my family every single day and would not change that for the world. If you need help, hit me up, come and hang out in my Facebook group and connect with other likeminded, highly driven individuals! I wish you well in success.
How to Remove Powered by Shopify
- From your Shopify Dash go to Online Store > Themes
- Find the theme you have published and click Actions > Edit
- In the Filter translations box, type “powered“.
- In the Powered by Shopify box, hit space to type a single space.
- Click Save
And that is how to remove the powered by shopify branding. Cheeky side note. If you’re in a vertical that allows for some humor… try this. We have a biker store and changed ours to read “Powered by High Octane Gas”. Have a little fun.
How to Change Shopify Store Name
- From the Shopify Dash on your desktop.
- Click Settings on the bottom left of your screen.
- Click General.
- You’ll see your current store name in the Store name field. Change it to your new name.
- Click the Save button on the top right to save your changes.
Shopify Tutorial – Conclusion
Congratulations! You have now set up your store and you’re ready to start selling. If you need help with selecting niches (check out The Top 5 Profitable Niches in Ecommerce) or adding apps (check out The Top 10 Best Apps on Shopify in 2018).
Once you’ve completed the setup of one store it becomes quite easy to set up any future stores.
I can now get a store setup ready for selling in just a couple of hours. Less time spent on getting ready for market is more time spent on making sales!